Managing a company’s fleet of printers using Windows 10 may be a little different from its predecessors. In January 2020, Windows 7’s End of Life phase required many companies to upgrade their workstations to the latest version of the world’s most popular Operating System (OS). Luckily, Microsoft designed Windows 10 to include all the features from Windows 7 that companies liked, but there are some differences between the two environments.
For organizations that aren’t familiar with the new OS, knowing how to install, configure, and manage their printers will be important. They’ll need to know how to connect a printer in Windows 10 and how to ensure their employees use the right device in the office. This guide will help companies with their printer configuration in Windows 10.
How to Connect a Printer in Windows 10
Windows 10 provides a similar interface to Windows 7 for managing and administrating printers. Depending on whether the printer uses a wired, network, or wireless connection, the steps to connect the device may be different.
Connecting a Wired Printer on Windows 10
If the printer uses a USB cable, switch on the device, and connect it to the PC’s port. Modern printers should automatically install the necessary drivers from the Windows software library. If the device requires special software, the company can download the applications from the Original Equipment Manufacturer (OEM) website.
To connect the printer with a USB cable:
1. Download the software (if the company doesn’t have the CD that came with the printer).
2. Install the required software on the PC.
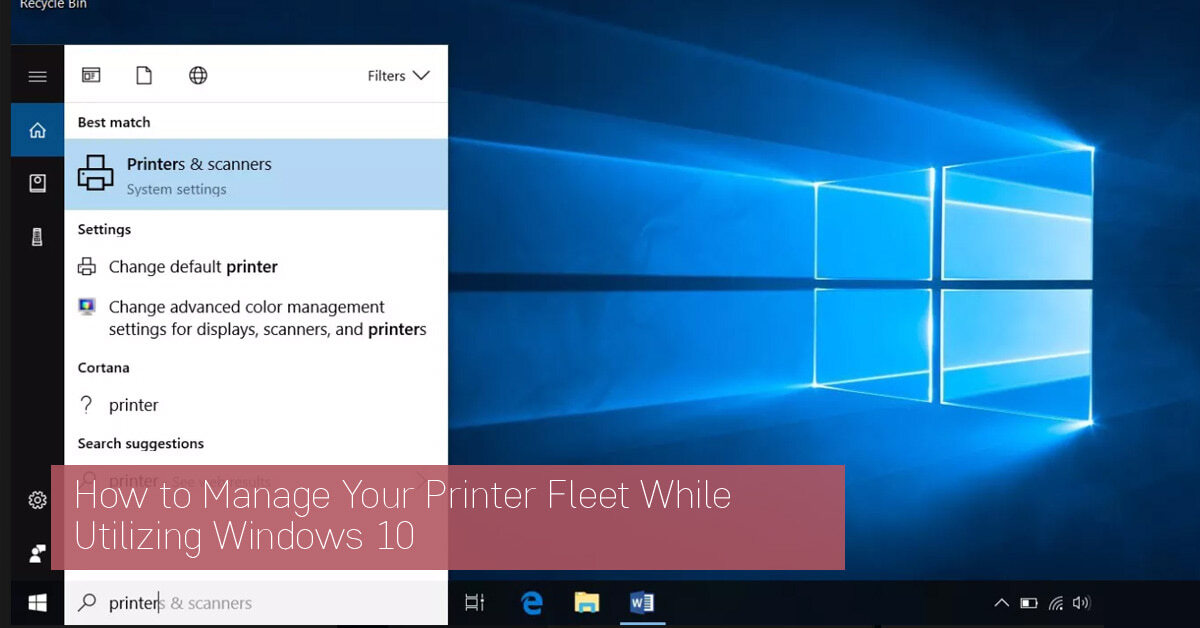
3. Click on the Windows Key and type “Printers” in the Omnibox.
4. Select the Printers and Scanners option from the search results.
5. Use the wizard to add the printer by clicking on the “Add a printer or scanner” option.
Windows will search for the printer connected to the PC and add it to the list of printers available. Once the printer is available on the list, clicking on it will show the additional options to manage the printer.
Connect a Network Printer to a Windows 10 PC
Adding a network printer (using either a Local Area Network or Wireless Access Network) is similar to connecting a wired printer. If the printer is on the network, clicking on the option “Add a printer or scanner” should bring up the printer, and the administrator can add it to the list of printers available on the PC.
If the printer doesn’t appear in the list, the administrator can add it manually by clicking on the “The printer that I want isn’t listed” option.
To add the network printer manually, follow these steps:
1. Click on the “The printer I want isn’t listed” option.
2. Choose the option that applies to the company’s printers.
The right option will depend on how the company configures its network printers. These options include:
- My printer is a little older. Help me find it – This will scan for older model printers connected to the network or PC.
- Select a shared printer by name – Use this option if the printer’s name is available, and the administrator knows the network location and uses the Universal Naming Convention (UNC) path.
- Add a printer using TCP/IP address or hostname – Select if the admin knows the printer’s IP, the host machine’s network address, or the PC name is available.
- Add a Bluetooth, wireless or network discoverable printer – For printers previously configured for network discovery.
- Add a local printer or network printer with manual settings – Advanced configuration of the printer by entering the details manually.
Managing a Printer in Windows 10
After adding the printer to the PC, the administrator can change its settings by clicking on the printer in the list and selecting “Manage”. From the “Manage your device” window, administers can perform several actions.
These include:
- Printing a test page.
- Running a troubleshooter wizard if there’s anything wrong with the printer.
- Open and change the printer’s properties.
- Access the printing preferences to change color settings or default page configuration.
- View or change the hardware properties.
The above settings will be the same as previous Windows versions. Changing the settings will depend on how the administrator wants to configure the printer for the company’s users. From the “Manage your device page”, administrators can also view the print queue or set the device as the default printer.
Note that if the administrator lets Windows manage the default printer, it will change the PC’s default device every time a user sends a print to a different printer. Untick this option (located at the bottom of the printer list) if the default printer should be static on the PC.
Let Cartridge World Help you Manage Your Printer Fleet
Although Windows 10 makes it much easier to manage printers, there are better ways to manage a fleet of devices. Cartridge World can help companies regain control over their entire printer fleet and manage all printers using a central print policy. This will reduce waste in the office and give greater oversight over all print operations in the organization.
To find out more about printer configuration in Windows 10 (or how to manage your print fleet), reach out to Cartridge World today.